Three Critical Measurements to Take Before Buying Appliances

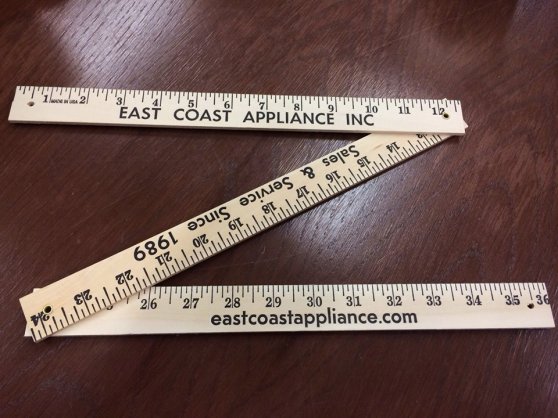
Folding yard stick from East Coast Appliance

Three Critical Measurements to Take Before Buying Appliances

If there is one type of purchasing approach that results in more appliance returns than any other, spontaneous shopping has to be at or near the top of the list. While the return of appliances after this type of shopping spree can be motivated by a number of factors, the leading cause is that the newly purchased products are of a size that makes their installation impossible, expensive, or ill advised. If you are in the decision stage of the appliance purchasing process, the first thing to remember is that buying on impulse can be a hit or miss drill with the misses unnecessarily consuming time, effort, and money.

To avoid these issues, be sure to include these three critical measurements on each appliance before making your final decision:

  • The space where each appliance will be installed – Trying to “eyeball” or guesstimate the dimensions of the locations for each appliance may work, but it probably won’t. Even the smallest miss can either make the installation more expensive due to modifications of surrounding counters and cabinets or make the appliance look like a poor fit for the space.
  • The appliances under consideration – Getting precise measurements on the appliances you want to buy is as important as measurements of the space they will occupy. When measuring both the space and the products, don’t forget to measure depth, as an appliance that extends beyond or is recessed back from surrounding counters/cabinets will look misplaced.
  • Any tight areas on the path from the curb to the kitchen, laundry room, etc. – The fastest way to find out that an appliance isn’t going to fit is if the product can’t be delivered due to obstacles on the path, whether they are on the interior or exterior of the home. Obstacles that can prevent delivery include narrow walkways, doorways, and staircases, especially those with tight turns. Measuring these areas in advance can ensure that your new appliances can get where they are supposed to go while also speeding the installation if, for example, doors need to be taken off of their hinges to allow passage.

Spontaneous shopping can be full of temptations, so be sure to check your measurements before you head to the store and after you get the cut sheets from your salesperson.
Four Important Things to Consider When Buying Appliances

Image

Major appliances are becoming increasingly computerized, a trend that is sure to continue as sensors and other devices facilitate both wireless and hard line connectivity with the web. While the trend toward increasing computerization and connectivity will deliver a number of conveniences, such as checking the inventory of a refrigerator and the remote operation of other appliances, technological capabilities will also add so many options that making a purchasing decision will become far more difficult. To help sift through the myriad of choices that now accompany major appliances, here are the four most important factors to consider before making a purchase.

1)      The base function plus features – Every appliance has a base function whether it’s a refrigerator’s job to keep food cold or a dishwasher’s job to clean dishes. If there are features and capabilities beyond the base function of the appliance that you know will come in handy, add them.

2)      Operational simplicity – The definition of simple operation may differ substantially between users, meaning that a computer programmer may find long protocols of commands to activate features a breeze while someone else may need to consult the owner’s manual to perform basic tasks. The important thing here is that you buy appliances that you can easily operate at their highest level of performance.    

3)      How each appliance will be used on a regular basis – If you are constantly cooking for an army, a larger refrigerator, dishwasher, and/or range may be in order as long as your kitchen has enough space. On the other hand, if you are usually cooking for smaller numbers, standard-sized appliances will likely suffice.

4)      Energy efficiency – If all other things are equal between appliances that you are considering for purchase, buy the most energy efficient model. This choice will result in monthly savings for a decade and maybe two, which can add up to a lot of money.        

Despite the growing number of things that appliances can do, each product still has one primary function. Starting there and then considering the other factors listed above will put you in a position to buy the right product every time.

Washing Machine Tips to Save Money

Electrolux Laundry From East Coast Appliance

Washing Machine Tips to Save Money

Getting the laundry done is often considered as the type of task that is performed in the same way every time with a primary goal of getting the chore done as quickly as possible. Contrary to this common theme, the shortcuts and habits that are frequently part of hustling through the job can actually require more time, use more energy, and treat apparel more harshly than taking a more methodical approach.

These mistakes include:

• Trying to do 1 ½ loads (or more) with one wash cycle – When the basin of the washer is overloaded in an attempt to run one less wash cycle, a variety of things can go wrong including items that don’t get cleaned properly as well as extra stress on the washer’s motor. The result of trying to wash more clothes than the machine can handle the first time often results in the need to run two additional cycles with reduced loads.
• Using the same amount of detergent every time – Wash loads can vary widely in the amount of soil content that has to be cleaned. Using the same amount of detergent on each load can result in an unnecessarily harsh washing environment for light loads and diminished cleaning power on heavy loads. Taking a minute or two to determine the recommended amounts of detergent for specific types of wash loads can save money and prevent you from having to re-do wash loads that didn’t start out with enough detergent.
• Using the same wash cycles and temperature settings every time – Wash loads that are made up of t-shirts generally require far less water and lower temperatures than those full of heavier fabrics and oil-based stains. Adjusting cycles and settings to match the wash load typically results in efficient washes that also save time and money.
• Neglecting the dispensers – Detergent and fabric softener residues tend to thicken and clog dispensers over time, resulting in a steady decline of washing efficiency. Rinsing these dispensers out with hot water every other month can keep them flowing free and deliver great wash results every time.

Rushing through the weekly laundry cycles can actually waste time and money. By running appropriately sized wash loads, making adjustments for different types of loads, and doing some minimal maintenance you’ll be able to maximize cleaning and minimize your laundry time.

Tips for Cleaning a Microwave

Image

These are some nice tips regarding the use and care of your microwave.

Microwaves have become an integral part of many families’ cooking habits so proper care is needed in order to get the most out of your microwave. The first step to proper microwave care is cleaning the inside. Cleaning a warm microwave is an easy way to get all the food spatter up. The best way to do this is to heat a bowl filled with water and some dish detergent, or white vinegar. The steam from the mixture softens the build-up and makes clean-up a breeze. You can also heat paper towels that have the same mixture on them.

Make sure when wiping out the microwave you remove the plate and any accessories such as shelves so you have an unobstructed area to clean. You’ll also want to take your time and clean the inside top, door, door frame and the seal if your microwave has one.

Always remember to remove and not use aluminum foil, metal containers, metal utensils and products with metal trim in your microwave. Metal can cause arcing and will damage the oven, possibly causing a fire.

When using your microwave always make sure any container is open and not sealed shut. Pressure can build inside the sealed container and cause it to explode. Baking potatoes should have the skin pierced to relieve pressure and eggs should never be cooked in the shell.

Lastly, if your microwave has a bad, musty smell, you can heat a 2 to 1 mixture of water to lemon juice in your microwave and let it sit 5-10 minutes. This will serve two purposes; 1) it will give your microwave a fresh, clean smell and 2) you can clean the inside of the microwave because the steam from the mixture makes a great cleaner.

Top ensure your microwave operates at its optimum, follow these simple guidelines from East Coast Appliance.

How to Clean a Dryer

Image

Keeping your dryer lint free is not just a dryer maintenance issue, it’s a safety issue.

The easiest part of the dryer to check is the lint filter and chute. This should be cleaned after each and every drying cycle. The area around and behind the lint filter should also be looked at after each drying cycle and any lint accumulation around those areas should be cleaned as well.

If you can’t reach or pick the lint with your fingers then use a vacuum with a long handle attachment and/or a soft bristle brush. Be sure to thoroughly vacuum the area after using a brush.

If it’s been a long time since you’ve moved your dryer, now would be a good time to do that. Pull the dryer out and look behind it. Clean and vacuum any lint on the floor and around the dryer vent hose and connections.

While the dryer is out from the wall you can take a look underneath the dryer. Have a friend or helper lend a hand by leaning the dryer back so you can vacuum underneath the dryer. Be sure to look up into the dryer cabinet and vacuum out any lint accumulation you see.

If lint in the dryer cabinet is exceptionally bad or difficult to remove, you can call our service department to schedule a technician to visit your home and take apart your dryer to clean it properly.

One area of dryer maintenance that often gets over looked by the homeowner is the dryer vent pipes. In most cases there are two pipes, or hoses. A hose usually goes from the dryer itself, to the wall or floor. After that point there is a pipe that runs out of the house.

Make sure the hose leading from the dryer to the wall is aluminum. White vinyl hoses no longer meet building codes and represent a fire hazard. If needed, you can stop by any of our super stores and purchase a new hose.

The long vent pipe that exits the house needs to be checked at least every 9-12 months. I’ve seen these cleaned with compressed air, brushes and very long handled vacuums. If you don’t have the right equipment, don’t risk packing the lint together, call a vent pipe cleaner specialist to do it for you.

Cleaning the vent pipe when replacing an old dryer with a new dryer is a very important step. New dryers don’t run the way old, inefficient dryers did. In order for new dryers to work properly, the vents must be clean.

If you have any other questions, please don’t hesitate to call our service department at 757-437-1100.